Image studio and featured images
Make studio, on-model and in-action product photos from your own images, and featured images for posts.
The image studio makes new product photos from your own photos, then checks each one against your product before you see it. You choose the shot and the style, and you decide which photos go on the product. The same tools make featured images for your blog posts.
Before you start
- A paid plan or the trial. The Free plan shows previews of what the studio makes.
- 50 credits for each image. The app shows the live price on each button.
- A product with at least one photo. The studio works on one product at a time.
- Open Image studio in the app menu. You can also reach it from a product's page or its Media section.
What does each plan include?
All three shots are on every paid plan. Saved looks cover product looks and blog looks together.
| Plan | Takes per shoot, and images at once | Saved looks | Formats for social and ads |
|---|---|---|---|
| Free | Previews only | None | None |
| Starter | 2 | 1 | None |
| Growth | 4 | 3 | Included |
| Pro | 4 | Unlimited | Included |
How do I shoot a product?
Choose the product
Select Start a shoot and pick a product. Shoot these first suggests products whose photo is too small to zoom in on, or that you monitor in AI shopping with no studio photo yet.
Tick the photos to study
Under Photos the studio studies, tick up to 3. A photo of the whole product in even light works best, and the first one ticked sets the angle.
Choose the shot
Under Choose the shot, pick Studio (your product alone on a lit set), On a model (worn or held by a model) or In action (in use, where it belongs).
Style it
Every choice under Style it starts on Automatic. Change what you like, and add a few words in Anything else (optional).
Shoot
Under Takes, choose how many different photos you want. Select Create 2 photos · 100 credits, or the button for your number. Each photo takes about half a minute, and you can leave the page while your photos arrive.
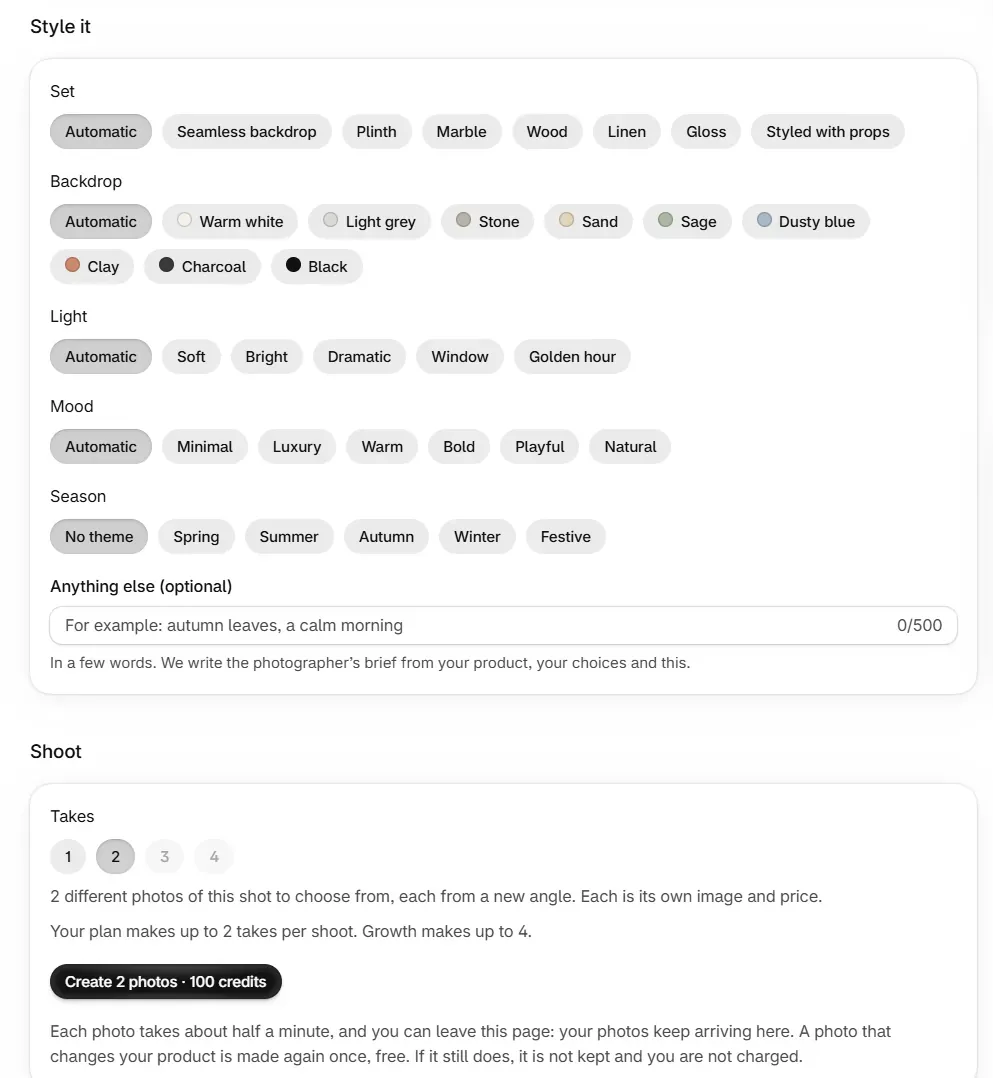
| Choice | Options |
|---|---|
| Set (Studio) | Seamless backdrop, Plinth, Marble, Wood, Linen, Gloss, Styled with props |
| Backdrop (Studio, or On a model in a studio) | Warm white, Light grey, Stone, Sand, Sage, Dusty blue, Clay, Charcoal, Black |
| Where (On a model) | In a studio, On location |
| Framing (On a model) | Full length, Waist up, Close on the product |
| Light | Soft, Bright, Dramatic, Window, Golden hour |
| Mood | Minimal, Luxury, Warm, Bold, Playful, Natural |
| Season | No theme, Spring, Summer, Autumn, Winter, Festive |
| Model's age (On a model, In action) | Automatic, Adult, Teenager, Child, Young child, Toddler, Baby |
Children are shown fully clothed in everyday settings, and never with swimwear, underwear, sleepwear or products for adults.
How do I read my results?
Each photo appears in Your photos from the studio, labelled with its shot and take. A finished photo carries the badge Matches your product and a line saying Kept until a date unless you add it.
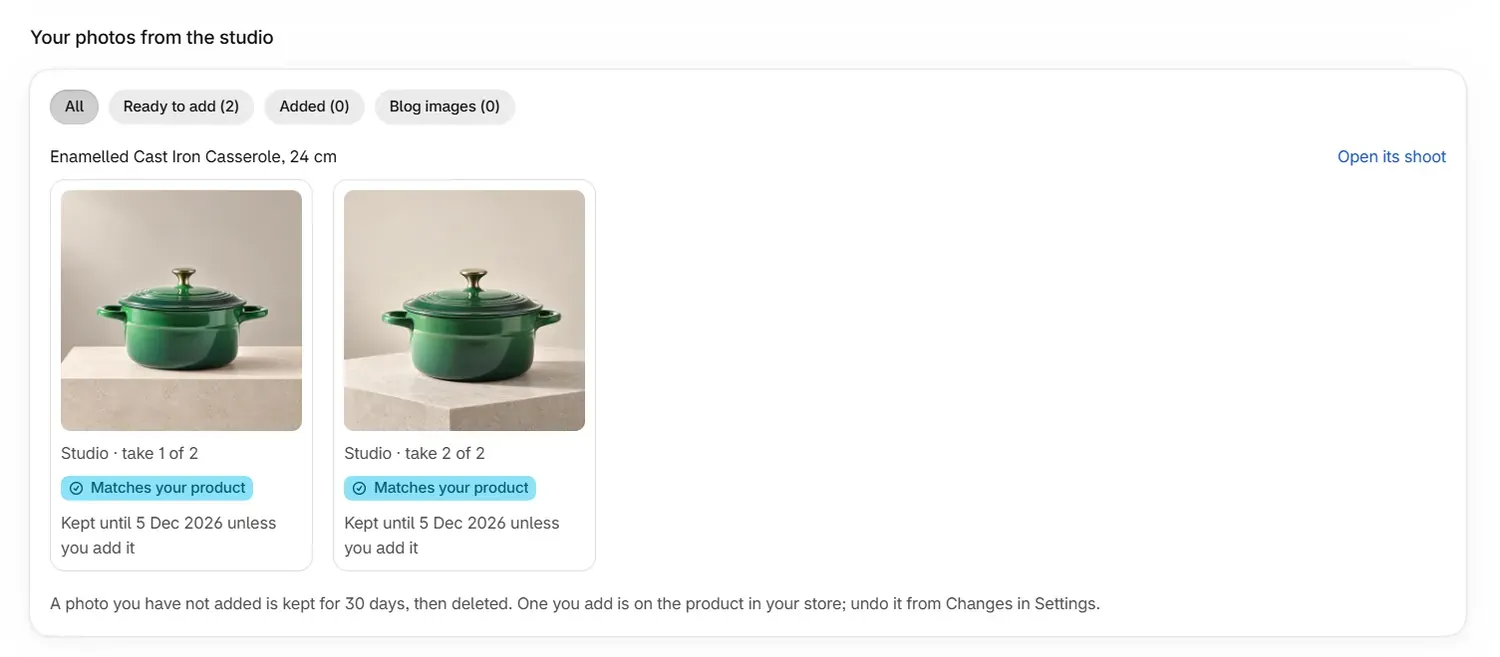
| What you see | Meaning |
|---|---|
| Waiting for the studio, Planning the shot, Shooting, Checking it is your product, Finishing | The photo is being made |
| Matches your product | It was checked against your photo for colours, print and logos, every part, and shape and size, and no change was found |
| Added | It is on the product |
| Saved to Files | It is in your store's Files |
| On us | Your free first photo |
| Free preview | A preview of what the studio can make |
| Kept until a date | Unused photos are kept for 30 days. The line turns amber as Deleted on a date in the last 3 days |
| Not kept | The photo changed your product. The reason is shown, with what changed, and you are not charged |
Use the filters All, Ready to add, Added and Blog images to find a photo.
How do I add a photo to a product?
Open the photo
Select a photo to view it. Compare with your photo gives you a slider, and View full size shows the detail. Look closely at labels, small print and colours before you add it.
Check the alt text
The Alt text box comes filled in, and you can change it.
Add it
Select Add to product or Add as main image. To add several, tick Select on each, then select Add to product.
The 2048 × 2048 image goes into Shopify beside your current images, and nothing is replaced. RankX AI reads it back to confirm it. To undo, open Changes in Settings. The image is taken off the product and your other images go back as they were, and the file stays in your Files. If the product's images were changed in Shopify after the photo was added, RankX AI leaves them as they are, and you can remove the image in Shopify.
What else can I do with a finished photo?
| Tool | What it does | Credits |
|---|---|---|
| Change something | A new take: More like this, Closer, Wider, Another angle, Another pose (not on Studio), Warmer light, Brighter, Simpler | 50 |
| How it was shot | Edit the description, then select Make another from these words | 50 |
| Formats for social and ads (Growth and Pro) | Portrait 4:5, Story 9:16 or Wide 16:9. Portrait can go on the product or to Files, and the other two go to Files | 50 each |
| Save this look | Saves the shot and its style under a name for later shoots | Free |
| Discard | Removes a photo you do not want | Free |
Saved looks appear under Your looks on the shoot page, where you can remove them. A saved blog look stays on your store and counts towards your allowance, so on Starter, which keeps one, choose it with care.
What does the small print notice mean?
The studio checks your ticked photos for small printed text for free. If it finds some, the shoot page says where, and the studio turns that part away from the camera, because AI image models often redraw small text wrongly. Your larger logos and designs stay as they are. A photo that still changes the text is not kept, and you are not charged for it.
What do the side panels show?
Ready for Google Shopping shows whether your main image meets Google's size, with a badge for the result. Studio photos are 2048 px and add no text, logos, borders or watermarks.
After your new images compares how often the products you sell appear in AI shopping answers before and after you add a studio photo. It reports what was seen, and monitoring the product turns it on.
Is there a free studio photo?
Yes. After the product check, a new store gets one free Studio photo, shown on Home as Your first studio photo, on us. It can be added on any plan. Free-plan stores also see previews of On a model and In action, and a preview needs a plan before it can go on a product.
How do I make a featured image for a blog post?
Open the panel
On an article's page, under Publish, select Make one with AI. You can also tick Make a featured image when it is ready when you start the article.
Choose an idea
Ideas from your article offers three free ideas. Pick one, or My own idea, and change What the image shows as you like. New ideas gives you more for free, up to 3 sets for an article.
Set the look
Choose a Style and Colours, or a saved look from Your blog looks. Tick Show one of the article's products to use your own product photos. That image is checked to be the same product, and is always a photograph.
Make it
Select Make the image · 50 credits. It takes about half a minute, and you can close the panel and come back.
Use it
Check the crop outlines and the Alt text, which is written from the picture. Select Use this image. It goes to your Files and fills the article's picker, and it reaches the article with your next Publish or Update on your store.
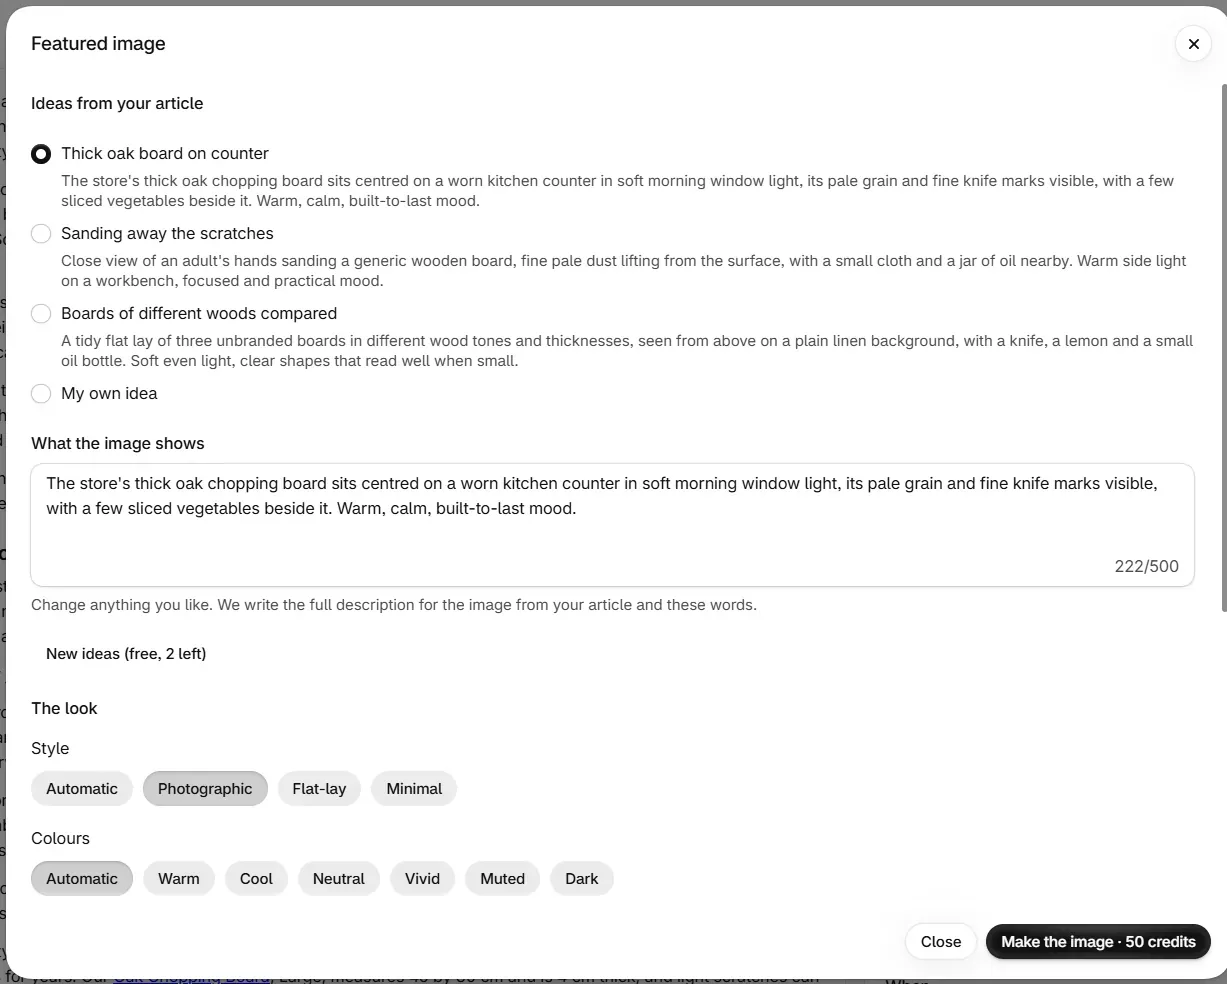
Blog images are 2048 × 1152, and every image made for an article is kept for 30 days unless you use it. Save this look keeps a style for your blog, and your newest blog look is chosen for every blog image.
Most themes show the featured image above the article and in the blog list. To use an image you already have, select Choose from your Files. A used image stays in Files even if the article is never published. It is not listed in Changes.
How do I make images for several articles?
When articles have no featured image, the Blog page says how many. Select Make images for them, check the list and select the button with the price. Each image is made from its article in your blog look, up to 10 articles at a time and within your plan's limit. Nothing is added to an article until you use its image on the article's page.
The image file says it was made with AI, which Google reads. If you sell on Google, also turn on the AI label for it in Merchant Center.
Why was my image not made?
Nothing is charged in any of these cases.
| Message | Cause | What to do |
|---|---|---|
| "The new image did not keep your product exactly as it is, so it was not kept." | The check found a change, including after one free retry | Shoot again, or tick different photos |
| "The image model refused this request." | The request could not be made as written | Change your ideas and try again |
| Add a photo first | The product has no photo | Add one on the product's page |
| "This product is for adults, so it is never shown with a child or a teenager." | The product is for adults | Choose Adult or Automatic |
| "Choose this product's category first" | The category is needed to tell if it suits a younger model | Set the category, or choose Adult or Automatic |
| "Your plan makes up to 2 takes per shoot." | You chose more takes than your plan offers | Choose fewer, or see Plans and billing |
| "Your plan makes up to 2 images at a time" (or another number) | Images are being made | Start this one when they finish |
| "Your plan keeps 1 saved look." | Your allowance of looks is used | Remove one, or see Plans and billing |
| "Another saved look already has that name." | The name is taken | Choose a different name |
| "You have seen all the new ideas for this article." | You used the 3 sets | Choose one of these, or write your own |
| "Your credits could not cover this image." | Your balance is short | See Credits |
| "Making images with AI is included in every paid plan." | You are on the Free plan | Choose a plan |
What to do next
Questions
Does the image studio replace my product photos?
No. A studio photo is added beside your current images, and nothing is replaced. You can undo it from Changes in Settings.
How much does a studio photo cost?
50 credits for each image. A photo that cannot be made, or that changes your product and is not kept, is not charged.
How long are unused photos kept?
A photo you have not added is kept for 30 days, then deleted. The tile shows the date.
Do I need a photo of the product first?
Yes. The studio always starts from your own photos, so it shows the product you actually sell. Add a photo on the product's page, then come back.
Are the images marked as made with AI?
Yes. Every image file says it was made with AI. If you sell on Google, also turn on the AI label for it in Merchant Center.
Last updated