How to take product photos: phone, light and Google's rules
How to take product photos with a phone, a window and white paper, then edit, size and name them so they pass Shopify, WooCommerce and Google Merchant Center rules.
 Published 15 minute read
On this page 12 sections
- What good product photography needs to do
- Essential equipment: phone, camera, tripod and light
- Setting up a simple home studio for your shoot
- The shots every product page needs
- How to take product photos: camera settings and angles
- Editing product images without changing the product
- Sizes and formats for Shopify, WooCommerce and Google
- What Google Merchant Center rejects
- Alt text and file names for search
- A beginner's product photo checklist
- Summary: what good product photos come down to
- Check one exported photo before uploading the range
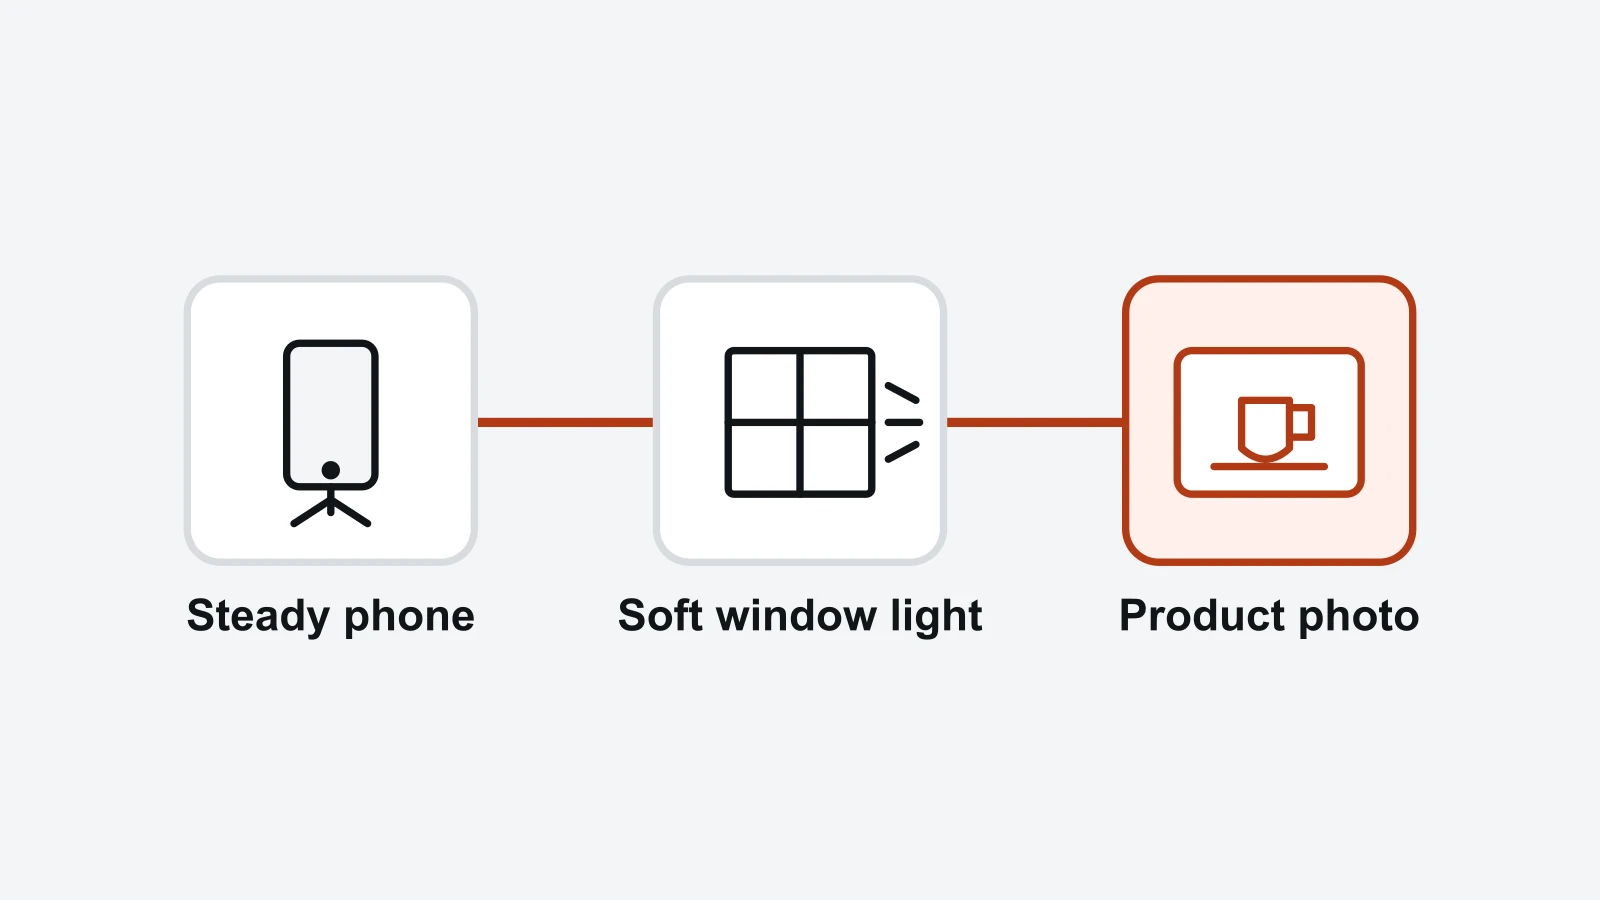
Short answer: How to take product photos: put a phone on a tripod and light the product from the side with a diffused window, against plain white paper. Shoot a main photo plus angle, detail and scale shots. Correct colour and exposure without altering the product, then export square sRGB JPEGs of at least 1500 x 1500 px.
What good product photography needs to do
A good product photo shows the exact item a shopper will receive. It is in true colour, sharp from edge to edge, and set on a background that does not compete with it. It also has to pass the rules of every place it appears: your Shopify or WooCommerce product page and Google Merchant Center.
Three jobs every photo does
- Replace the shop counter. A shopper cannot pick the item up, so the photos must answer what they would otherwise check by hand: size, texture, finish and what is inside.
- Match the listing. The colour in the photo must match the colour named in the title, the variant and the product descriptions, or the shopper receives something different from what they saw.
- Survive a thumbnail. The same file is cropped square and shown small in collection grids and Google Shopping results.
For a small business, the photos often carry the whole case for quality, because shoppers meet the product on a screen first. Photos that match the item also spare customers a surprise when the parcel arrives.
The third job now includes AI answers. When ChatGPT shows a product carousel, your product card sits beside other merchants' cards for the same prompt. How ChatGPT Shopping reads your product feed covers the data behind those cards.
Essential equipment: phone, camera, tripod and light
You can take good product photos with a recent phone, a phone tripod, light from one window and a roll of white paper. A dedicated camera helps with very small items and fine texture. For most online store photography, though, steady light and a steady phone make more difference than the camera body.
Phone
Use the rear camera, never the selfie camera. Wipe the lens before every session, because a fingerprint smear makes a soft, hazy image that no edit fixes.
Tripod and trigger
A phone tripod with a clamp keeps every shot at the same height and angle, which is what makes a catalogue look consistent. Fire the shutter with a Bluetooth remote or the camera's timer, so pressing the screen does not shake the phone.
Light
Window light is free, large and soft, and daylight shows colour accurately. Soften it further with a diffuser, such as baking paper, a white shower curtain or a sheer curtain across the glass.
If you shoot after dark, use continuous LED panels with a high colour rendering (CRI) rating. Turn off the room's warm bulbs so two colours of light do not mix on the product.
Background and fill
A roll of white paper or a large white card makes an unbroken sweep behind and under the product. A white foam board opposite the window bounces light back into the shadow side. A black card does the reverse when you want deeper shadows on a glossy or white product.
Tips for shiny products
Glass, metal and glossy finishes reflect whatever faces them, including you and the window. Use the largest diffuser you can, then move the light or turn the product until the bright hot spot slides off the main face. Stand black cards close to the edge of the frame to draw dark, defined edges on glass, and check reflections at full size before you move on.
When a camera is worth it
A dedicated camera earns its place for jewellery, small electronics and fine fabric, where a macro lens shows more detail. It also lets you tether: the camera connects to a laptop, so each shot appears full size in Adobe Lightroom Classic as you take it.
The full kit:
- Phone with a clean rear lens
- Phone tripod with a clamp
- Bluetooth remote, or the camera timer
- Diffuser for the window
- White paper roll or card for the sweep
- White foam board as a reflector
- Masking tape and a grey card
When to book a professional product photographer
A professional product photographer is worth booking for hero images, editorial or lifestyle campaigns, and commercial work such as packaging and adverts. They bring studio lighting, retouching skills and a consistent style across a range. Before you book, look through their portfolio for products like yours, and agree in writing where the images may be used, because the licence sets that.
Many small business owners shoot the full catalogue themselves and book a professional only for the few images that front the brand.
Setting up a simple home studio for your shoot
A home studio for product photos is a table beside a window, with a white paper sweep curving from the wall onto the table. Add a diffuser over the glass and a white reflector on the shadow side. Set it up once and mark positions with tape, and every product in your range is shot under the same light.
- Choose the window
No direct sun while you shoot
- Turn the table side-on
Light falls across the product
- Build the sweep
White paper curving from wall to table
- Diffuse the window
Baking paper or a sheer curtain
- Add fill
White foam board on the shadow side
- Turn off the room lights
Avoid mixed colours of light
- Mark everything
Tape the product spot and tripod feet
One window, one table and white paper give every product in a range the same light.
- Choose the window. Pick one that gets no direct sun while you shoot. In the UK and the rest of the northern hemisphere, a north-facing window gives the steadiest light; in the southern hemisphere, a south-facing one does.
- Turn the table side-on. Put the table at right angles to the window, so light falls across the product from one side and shows its shape and texture.
- Build the sweep. Tape white paper to the wall and let it curve down onto the table, so there is no line where wall meets table.
- Diffuse the window. Cover the glass with baking paper or a sheer curtain to soften shadows.
- Add fill. Stand a white foam board opposite the window to lift the shadow side.
- Turn off the room lights. Mixed daylight and warm bulbs give a colour cast that is hard to correct.
- Mark everything. Tape the product's spot and the tripod's feet, so the next shoot matches this one.
Shoot one test product first and check it on a computer screen as well as on the phone. If the white background looks grey, the exposure is too low. If the shadow side is black, move the reflector closer.
Write down what you changed after each shoot. Those lessons become your setup notes, so the next session starts where this one finished.
For clothing, swap the sweep for a flat lay. Lay the garment on white card and shoot from directly above, or use a mannequin or a model to show fit.
The shots every product page needs
A product page should carry at least six kinds of shot: a main photo on a plain background, front, back and side views, a close detail, a scale shot, an in-use photo, and a photo of each colour variant. Google Merchant Center accepts one main image plus up to 10 additional images (opens in a new tab) per product.
- Main photo. A front or three-quarter view on white or a light, plain background, with the product filling most of the frame and no props or other distractions. This is the image Google and your collection grid show first.
- Front, back and sides. Shoot from the same height, turning the product rather than moving the camera.
- Detail. Texture, stitching, the label, ports or the clasp: whatever a shopper would inspect in a shop.
- Scale. The product in a hand, beside a mug or worn, so its size reads at a glance.
- In use. The product doing its job in a real setting. This editorial-style shot also works for social posts.
- Each variant. Photograph every colour on its own. Recolouring one photo in software risks showing a colour the shopper will not receive.
Most store platforms, Shopify and WooCommerce included, let you give each variant its own image, so choosing a colour shows that colour's photo.
Put the main photo first everywhere. Google takes the main image from the image_link attribute and extra views from additional_image_link, so check which photo your store sends as the main one.
Set a house style
Decide your style once: background, camera height, margin around the product and whether shadows stay. Write it down, so every image on your ecommerce website looks like one brand took it, whoever pressed the shutter.
How to take product photos: camera settings and angles
To take product photos with a phone, clean the lens and use the main 1x lens, or 2x if your phone has one. Turn the flash off and tap to focus on the product. Lock focus and exposure, then lower the exposure until the background is bright and the product keeps its detail.
Phone settings
- Lens: the main 1x lens, or 2x if your phone has a telephoto. Avoid the ultra-wide lens and digital zoom, which distort or soften the product.
- Flash: off. It flattens shape and throws hard reflections.
- Grid: on, to keep edges straight and the product centred.
- Portrait mode: off. Its software blur can eat into the product's edges.
- Focus and exposure lock: on iPhone, press and hold on the product until AE/AF LOCK appears, then drag the sun icon down a touch. Many Android camera apps offer the same lock or a Pro mode.
- RAW: if your phone offers RAW or ProRAW, use it where colour matters. The files are larger but take colour correction better.
Camera settings
If you shoot on a dedicated camera, such as a Canon or any other interchangeable-lens model, put it on the tripod and use manual or aperture priority mode. Treat these as starting points and adjust to the product:
- ISO: the camera's lowest native setting, for the cleanest image quality.
- Aperture: around f/8 to f/11, so the whole product is sharp from front to back.
- Shutter speed: whatever gives a correct exposure. On a tripod, a slow shutter is fine.
- Trigger: a 2-second timer or a remote, so pressing the button does not shake the camera.
- White balance: a fixed setting, matched to the grey card.
- File format: RAW, to capture the most detail for editing.
White balance
Set white balance (WB) once per session and leave it. In a Pro mode, set a fixed white balance. Otherwise, put a grey card in the first frame of each setup and correct every photo to it in editing.
Angles
Shoot the main photo with the phone slightly above the product's centre, looking a little down, the way a shopper sees it on a counter. Shoot flat items and folded clothes from directly overhead.
Step back and use the 2x lens instead of moving close with the main lens. Close-up wide angles stretch the nearest part of the product, which makes it look a different shape.
Check before you move on
Zoom in to full size on the screen after each setup. Check focus on the front edge, dust on the product and marks on the background. A re-shoot now takes a minute; a re-shoot next week means rebuilding the set.
Editing product images without changing the product
Edit product photos to correct the camera, never the product. Set white balance, exposure and crop, remove dust, and clean the background to pure white if your store uses one. Changing the product's colour, shape or texture misleads buyers, so photograph each colour variant rather than recolouring one.
The edit, in order
- Crop and straighten to square, leaving a small, even margin around the product.
- White balance using the grey card or a known white area.
- Exposure until the background is white without the product's highlights losing detail.
- Spot removal for dust, hairs and fingerprints. These are not part of the product, so removing them is fair.
- Background clean-up to pure white if your store uses white, with a selection or masking tool.
- Sharpening, lightly, for screens.
- Export as a square sRGB JPEG, at the size in the next section.
In Adobe Lightroom Classic or Photoshop, the histogram shows whether exposure is right. The white background should bunch at the right edge, while the product's own tones stay inside the graph.
What not to change
Do not reshape, recolour or remove flaws that belong to the item, such as a knot in wood grain or a drip in a hand glaze. The shopper will receive that item, and a photo that hides it sets up a complaint.
Leave text, logos and borders out of the file as well. Google Merchant Center refuses them, as a later section explains.
Keep a batch consistent
Lightroom Classic presets save an edit so you can apply it to every photo from the same setup. Keep the untouched originals in a separate folder, so you can re-export at a new size without a new shoot.
From RankX AIPrepare product photos and check alt text for your store.After uploading, inspect the main image and thumbnails on a phone and a desktop.Start your free trialSizes and formats for Shopify, WooCommerce and Google
Our working default for one file that suits Shopify, WooCommerce and Google Merchant Center is a square sRGB JPEG at 2000 x 2000 px. It clears Google's minimum and recommended sizes, and it stays inside Shopify's size limit. Every limit below comes from each platform's own help pages, read on 14 November 2026.
- 12 MP photo, square crop9.1 MP
- 48 MP photo, square crop36.6 MP
- 2000 px export4 MP
- Shopify limit25 MP
- Google limit64 MP
A square crop from a 48 MP phone photo exceeds Shopify's 25 megapixel limit, so resize to 2000 x 2000 px before upload. Illustrative crop calculations from the worked example; platform limits checked on 17 November 2026 against Shopify Product media types (source 4) and Google image_link (source 1).
What | Shopify | WooCommerce | Google Merchant Center |
|---|---|---|---|
Size limit | Up to 5000 x 5000 px or 25 megapixels | Your WordPress host's upload limit | 500 x 500 px minimum from 31 January 2027; no image over 64 megapixels |
File size limit | Under 20 MB | Your WordPress host's upload limit | No file over 16 MB |
Recommended upload | Square images usually display best at 2048 x 2048 px (Shopify) | Larger than your theme's biggest display size | 1500 x 1500 px or above (Google's recommendation) |
What it does with your upload | Resizes it for each slot in your theme | Makes its own sizes from it (see below) | Reads |
Shopify
Shopify accepts product images up to 5000 x 5000 px or 25 megapixels, under 20 MB, according to its product media types page (opens in a new tab). Shopify says: "For square product images, a size of 2048 x 2048 px usually displays best." Square uploads keep collection grids even, because every card has the same shape.
WooCommerce
WooCommerce resizes every upload into its own image sizes. For classic themes, by default it makes a 600 px wide single product image (uncropped), a 300 px wide thumbnail cropped 1:1 and a 100 x 100 px gallery thumbnail, as WooCommerce's image sizes documentation (opens in a new tab) sets out.
You can change the thumbnail cropping in the WordPress Customizer, under WooCommerce and Product Images. If your uploads are already square, a 1:1 crop removes nothing.
Google lists JPEG, WebP, PNG, GIF, BMP and TIFF for image_link. JPEG is the safe choice for photos. Export in sRGB, the web's default colour space, because a photo saved in Adobe RGB can look dull in apps that ignore its colour profile.
Marketplaces
If you also sell on Amazon or Etsy, each marketplace publishes its own image rules in its seller help pages. Check them before you reuse these files, because this article covers Shopify, WooCommerce and Google only.
Worked example: checking two phone photos
This worked example is illustrative. You shoot the same mug on two phones, one with a 12 megapixel camera and one with a 48 megapixel camera, both at a 4:3 ratio.
- The 12 MP photo is 4032 x 3024 px. A square crop is 3024 x 3024 px, which is 9.1 megapixels: inside Shopify's 25 and Google's 64.
- The 48 MP photo is 8064 x 6048 px. A square crop is 6048 x 6048 px, which is 36.6 megapixels: over Shopify's 5000 px and 25 megapixel limit, though inside Google's 64.
- Resize both to 2000 x 2000 px, which is 4.0 megapixels, and both pass Shopify's and Google's size limits.
- Check the result: open each exported file's properties, confirm the pixel size, and confirm the file is under 16 MB, the lower of the two file caps. If you use WooCommerce, also check it against your WordPress host's upload limit.
What Google Merchant Center rejects
Google Merchant Center rejects product images with promotional overlays, watermarks or copyright symbols, barcodes or QR codes laid over the photo, added logos or store names, placeholder graphics that say no image is available, borders, and illustrations that don't show the product. Its help page, read on 14 November 2026, also sets size rules: no image over 64 megapixels or 16 MB, and Google has announced a minimum of 500 x 500 px for all products from 31 January 2027.
Google's requirements for the image_link attribute (opens in a new tab) name what a product image must not contain:
- Promotional overlays, such as 'Sale', 'Free delivery' or a price burst
- Watermarks, copyright symbols or graphic stamps
- Barcodes, QR codes or serial tags laid over the photo
- Added logos or store names laid over the photo
- Placeholder graphics that say no image is available
- Borders or frames around the photo
- Illustrations that do not show the product
A brand name printed on the product itself is part of the product. The rule is about text and graphics added to the image file.
Why your store photo is the one Google sees
Google describes Merchant Center (opens in a new tab) as "a free tool that helps millions of shoppers on Google discover, explore, and buy your products." It can take product data automatically from your online store, so the photo on your product page is often the photo Google receives.
Keep promotions in your theme's sale badges, which sit on the page rather than inside the image file, so the file Google fetches stays clean.
Merchant Center data feeds Google surfaces including Search, Maps and YouTube. For how Google's AI search surfaces differ, see Google AI Mode vs AI Overviews.
Alt text and file names for search
Give every product photo a descriptive file name and alt text that says what the image shows, such as the product, colour and view, in plain words. Google's image guidance recommends both, and alt text is also what screen readers announce to shoppers who cannot see the photo.
File names
Google's image SEO guidance (opens in a new tab) gives the example that "my-new-black-kitten.jpg is better than IMG00023.JPG". Rename files before you upload, because the uploaded file name usually becomes part of the image's address.
A pattern that scales across a catalogue: product, key attribute, view.
oak-chopping-board-large-front.jpg
oak-chopping-board-large-juice-groove-detail.jpg
oak-chopping-board-large-in-use-kitchen.jpg
Alt text
Describe what that one photo shows in a short phrase. Google's image guidance warns against filling alt text with keywords, and each shot gets its own text because each shows something different.
<img src="oak-chopping-board-large-front.jpg"
     alt="Large oak chopping board with juice groove, front view on white">
On Shopify, open the image in the product's media and add alt text there. On WooCommerce, use the Alternative Text field in the Media Library. Product page SEO for ecommerce and Shopify SEO cover the rest of the page, and how AI crawlers read your site explains what crawlers can and cannot see.
A beginner's product photo checklist
Run this product photo checklist before you upload. Each photo shows the exact item, sharp and true to colour, on a clean background with no overlays or borders. It is a square sRGB file at or above Google's recommended size and under 16 MB, with a descriptive file name and alt text.
- Lens clean, tripod set, room lights off
Wipe the lens and steady the phone before shooting.
- Window diffused, reflector in place
Keep light soft and lift the shadow side.
- Focus and exposure locked on the product
Keep the product sharp without shaking the phone.
- All six kinds of shot taken
Include main, angle, detail, scale, in-use and variant photos.
- Colour corrected, product unchanged
Correct the camera while keeping the item true to life.
- Square sRGB JPEG under 16 MB
Export the square photo in the web colour space.
- No overlays, logos, watermarks or borders
Keep added graphics out of the photo file.
- Descriptive file name and alt text
Describe the product and the view in plain words.
Run these eight checks on every product before its photos go live.
Before the shoot
- Lens wiped, tripod set, room lights off
- Window diffused, reflector in place, positions taped
- Grey card in the first frame of each setup
During the shoot
- Focus and exposure locked on the product
- Main photo, views, detail, scale, in use and each variant taken
- Each setup checked at full size on screen
Before upload
- Square crop, white balance and exposure corrected, dust removed
- Product shape, colour and flaws unchanged
- sRGB JPEG at our working default size, under 16 MB
- No text, logos, watermarks, borders or placeholders
- File named in words, alt text written
- Main photo set as the first image
Summary: what good product photos come down to
Good product photos come from steady light, a steady phone and a set you can rebuild, more than from expensive kit. Shoot the six kinds of shot, correct the camera while leaving the product as it is, export one square sRGB file that clears Google's and Shopify's limits, and name it in words.
Where RankX AI fits
If your store is on Shopify, the RankX AI Shopify app runs inside Shopify admin. Its Free plan includes alt text checks across the store. On a paid plan, its Image studio makes new product photos from each product's own photos, at a published credit rate per image, and adds each finished image to the product without replacing the original (RankX AI for Shopify).
Once the photos are live, see whether ChatGPT Shopping and Google AI Mode show them with RankX AI Shopping, or See pricing.
Check one exported photo before uploading the range
Open one exported photo at full size beside the physical item. Check that its colour, shape and visible details match, then read the pixel dimensions and file size in its properties. Keep the untouched original so a failed export can be corrected without another shoot.
After uploading, inspect the main image and thumbnails on a phone and a desktop. Confirm that the crop keeps the whole product visible and that the image has its own descriptive alt text. On WooCommerce, check the actual theme sizes and the host upload limit rather than assuming the classic-theme defaults apply.
Next, check the rest of the product page or review Shopify SEO.
Questions about Ecommerce & Technical SEO
How do I take product photos with my phone?
Put the phone on a tripod beside a window, use the main or 2x lens with the flash off, and lock focus and exposure on the product. Fire the shutter with a timer or remote so the phone does not shake. Check each shot at full size before you move on.
What background is best for product photos?
A plain white or light background is best for the main photo, because it keeps attention on the product and stays clear at thumbnail size. Use a paper sweep curving from wall to table so there is no horizon line. Save textured or room backgrounds for in-use shots.
What size should product photos be?
Our working default is a square image at 2000 x 2000 px. Google Merchant Center recommends around 1500 x 1500 px or above and has announced a 500 x 500 px minimum from 31 January 2027, and Shopify accepts up to 5000 x 5000 px or 25 megapixels. Keep files under 16 MB, Google's cap, which also clears Shopify's 20 MB limit.
What does Google Merchant Center reject in product images?
Google Merchant Center rejects images with promotional overlays, watermarks, barcodes or QR codes laid over the photo, added logos or store names, placeholder graphics saying no image is available, borders, and illustrations that don't show the product. It caps images at 64 megapixels and 16 MB, and from 31 January 2027 requires at least 500 x 500 px.
How many photos should a product page have?
Aim for six kinds of shot: a main photo, front, back and side views, a detail, a scale shot, an in-use photo and one photo per colour variant. Google Merchant Center takes one main image and up to 10 additional images per product, so most sets fit; a product with many colour variants may need to choose which views to send.
Sources
- Google Merchant Center Help: Image link [image_link] (opens in a new tab) Checked 2026-11-17.
- Google Merchant Center Help: Additional image link [additional_image_link] (opens in a new tab) Checked 2026-11-17.
- Google Merchant Center Help: About Merchant Center (opens in a new tab) Checked 2026-11-17.
- Shopify Help Center: Product media types (opens in a new tab) Checked 2026-11-17.
- WooCommerce: Image sizing for theme developers (opens in a new tab) Checked 2026-11-17.
- Google Search Central: Image SEO best practices (opens in a new tab) Checked 2026-11-17.
- RankX AI: Shopify integration Checked 2026-11-17.
Asif Syed is the founder and CEO of RankX AI, the AI search visibility platform. He builds the product and writes here about GEO, AI search measurement and WordPress.
CoversThis article covers the Ecommerce & Technical SEO topic, the Website Audit feature and the AI Crawler Access Checker tool.
Terms usedProduct feed, ChatGPT Shopping, AI Crawler and Google AI Mode.
Read this page asMarkdown: /blog/how-to-take-product-photos.md.
All articlesEverything RankX AI publishes is listed on the blog index.
Ask an assistantAsk ChatGPT (opens in a new tab), Ask Claude (opens in a new tab) or Ask Perplexity (opens in a new tab).
Preferred sourceIf Google is your front door, you can add RankX AI as a preferred source (opens in a new tab), which asks your own results to surface more of what we publish.